Fishless Cycle: The Step by Step Guide

When setting up a new tank, you’ve likely heard the word “cycling” come up again and again. Cycling a tank is one of the first, and arguably the most important, steps in preparing it for new pets. Without cycling, your new fish will likely die within a few days. There are two ways to cycle a tank, fish-in and fishless cycling – today we’ll be discussing the fishless cycle.
What is a Fishless Cycle?
Fishless cycling of an aquarium is nothing new; it’s been done for decades! Cycling a tank involves growing beneficial nitrifying bacteria to process ammonia, which fish release as waste product. These bacteria feed on the ammonia and transform it into nitrite.
Nitrite is still fairly toxic to fish, however. Fortunately, a second set of bacteria eat that, transforming it even further into nitrate. Nitrate is relatively safe in higher concentrations and is removed through plant (or algae) growth and water changes!
So how do we get these useful bacteria into our water? Well, bacterial spores exist in the air and dirt all around us. So the bacteria will find their way into the tank, no problem. The challenge is in culturing them.
With fish-in cycling, we add a small population of hardy trailblazers to the tank. In a 10-gallon tank, this might be a guppy or two. By feeding the guppy lightly, it will release ammonia as a waste product, providing food for bacterial colonizers.
Any leftover food will also begin to decay, releasing more traces of ammonia into the system. Over time, more fish can be added to the system as your bacteria grow. But there is always the risk of too much ammonia accumulating for your new bacteria to consume, which can kill these initial pioneers.
That’s where fishless cycling comes in. Using this method, we can add precise amounts of ammonia to the water and ensure we get a proper cycle. This method also minimizes the chances of killing the first fish we add to the tank.
Essential Tools for Fishless Cycling
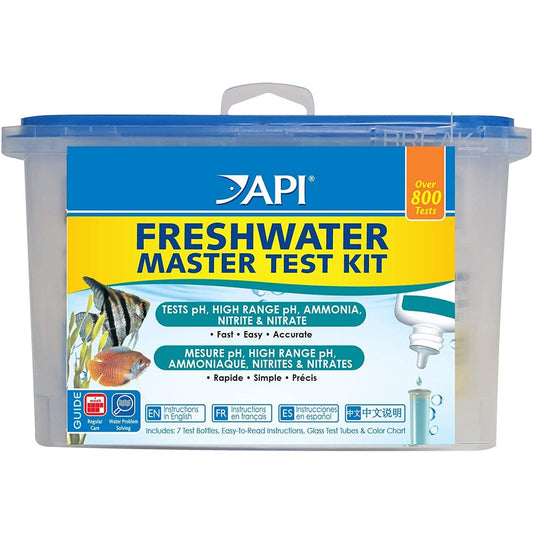
Aquarium Testing Kit
The first essential tool is a proper aquarium test kit! You might be tempted to buy testing strips since they are cheaper and easier to use. But test strips are far less reliable than liquid tests! The colors never match precisely and you really need to be precise with a chemical as toxic to fish as ammonia.
100% Pure Ammonia
The second essential tool is liquid ammonia. Since we won’t be cycling using live fish, we have to add ammonia to provide food for the nitrifying bacteria that we want to grow in our tank.
Some aquarists advocate using fish flakes, pieces of prawn, or other items that can slowly rot. Rot-causing bacteria will release ammonia into the system but I don’t favor this approach. Rotting food also results in other noxious compounds that won’t be broken down readily and will harm your new fish.
Something to remember when fishless cycling is that you can’t use any old kind of ammonia. Most ammonia sold in stores is used for cleaning purposes and has additives like chlorine, surfactants, or fragrances to mask its distasteful odor. All of these chemicals are neutral or toxic to fish, so we need to use 100% pure ammonia.
Fishless Cycling a New Aquarium
Pre-Cycle Setup
The first step is to ensure that your entire aquarium system is up and properly running. This means a working heater, filter, sump, and any other equipment that provides a healthy environment for your fish.
The bacteria that we will be growing in the cycling process need to be able to colonize your filter and substrate, and require oxygen from the airstone and water flow. So these should already be running before adding ammonia to the tank.
Adding Ammonia to the System
Next we need to add pure ammonia to the system. If your ammonia source has directions on how much to add for a particular concentration then follow them carefully. Unfortunately, the majority don’t – and you will also run into issues with displacement. Meaning the volume taken up by the substrate, rocks, and other decorations subtracts from the actual water volume of your tank.
Therefore we need to experiment a little with how much ammonia to add to the system. First, we need to know how many drops of ammonia result in a particular concentration. To find this, fill a 1 or 5 gallon container with water. You can then start with 2 drops of ammonia per gallon, swirling the water around for a proper mixture. Then perform a test using your testing kit, adding more as needed.
Once you know how many drops results in the right concentration, add enough ammonia minus 20% to your filled aquarium. This accounts for the possible reduced water volume due to your decorations taking up interior space! We can then test the water and add more ammonia if necessary to hit the right concentration.
Precisely how high an ammonia concentration you need really depends on who you ask. I prefer adding enough ammonia to reach a concentration of 4 parts per million while others prefer 2 ppm.
A higher starting ammonia concentration will grow more bacteria, resulting in a safer environment for new fish. But more ammonia may also take more time to be reduced to safe levels.
Monitoring Your Water Parameters
Every two to three days, you’ll want to monitor not only ammonia but nitrite levels as well. Remember, nitrite is the first waste product released by nitrifying bacteria. Detectable nitrite can take up to a week to manifest but usually no longer.
Nitrite levels will sometimes spike at first to levels dangerous to fish since the second set of beneficial bacteria will need time to grow and take advantage of the sudden bounty. If this were a fish-in cycle, you’d likely need to perform a water change. But going fish-less, this is actually a good thing!
Since the ammonia levels will begin to drop at this point, you’ll need to add more ammonia to bring the system back to a concentration of 2 to 4 ppm. We don’t want ammonia levels to hit 0 ppm since we run the risk of starving all of the bacteria we’ve worked so hard to cultivate.

Nitrate Production
Once you have detectable nitrite, you’ll then want to prepare to monitor nitrate levels as well. You don’t need to do this right away; I would start testing for nitrate a week after you start detecting nitrite.
If nitrate is detectable then you can slow down on adding ammonia to the tank and allow nitrite to be mostly consumed. If nitrite levels remain relatively high while nitrate and ammonia are in the safe zone, then it’s clear that your nitrite-eating bacteria haven’t fully populated the tank. They need more time to grow, which means you’ll have to add a little more ammonia to the tank to keep your first bunch of germs happy.
Adding Your Fish
Within another week or at most, two weeks from initially detecting nitrate, you should see reductions of ammonia and nitrite to safe levels. To test this, dose ammonia to the same level you did on the first day. If within twenty four hours both ammonia and nitrite test at zero, you can add your fish! You may need to perform a water change if the nitrate levels are higher than what’s safe (20-30 ppm) but otherwise, the tank is fully cycled and ready for fish!
Summary
Fishless cycling an aquarium is a safe and efficient way to jump-start a new ecosystem for your fish. It ensures that your new pets will have a home fully cycled and ready to go. And it teaches new aquarists the ins and outs of the aquarium nitrogen cycle! While it’s a little more challenging in terms of balancing the water chemistry, it is just as effective as fish-in cycling!
No comments
Featured Products


comments